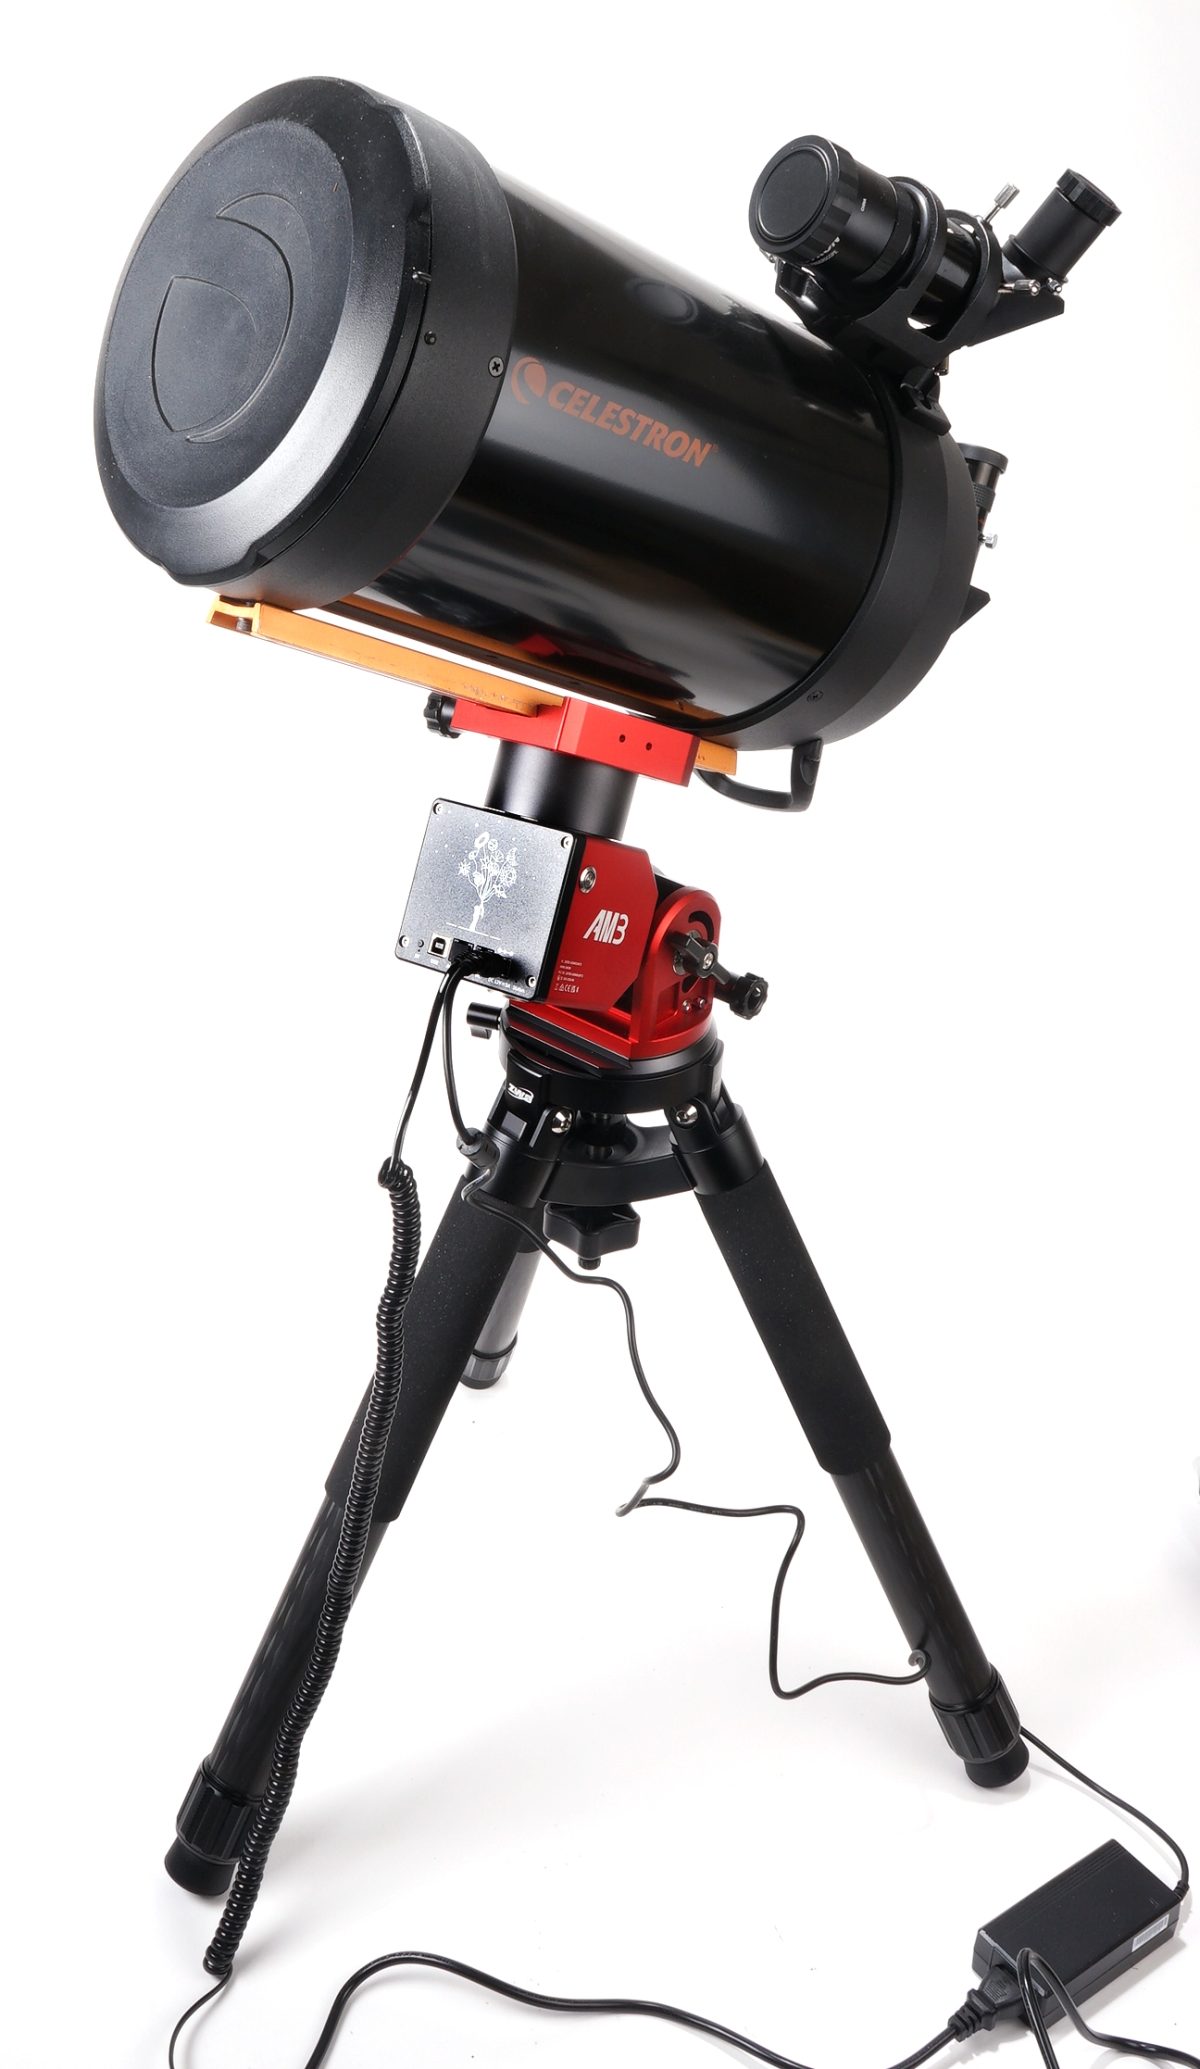
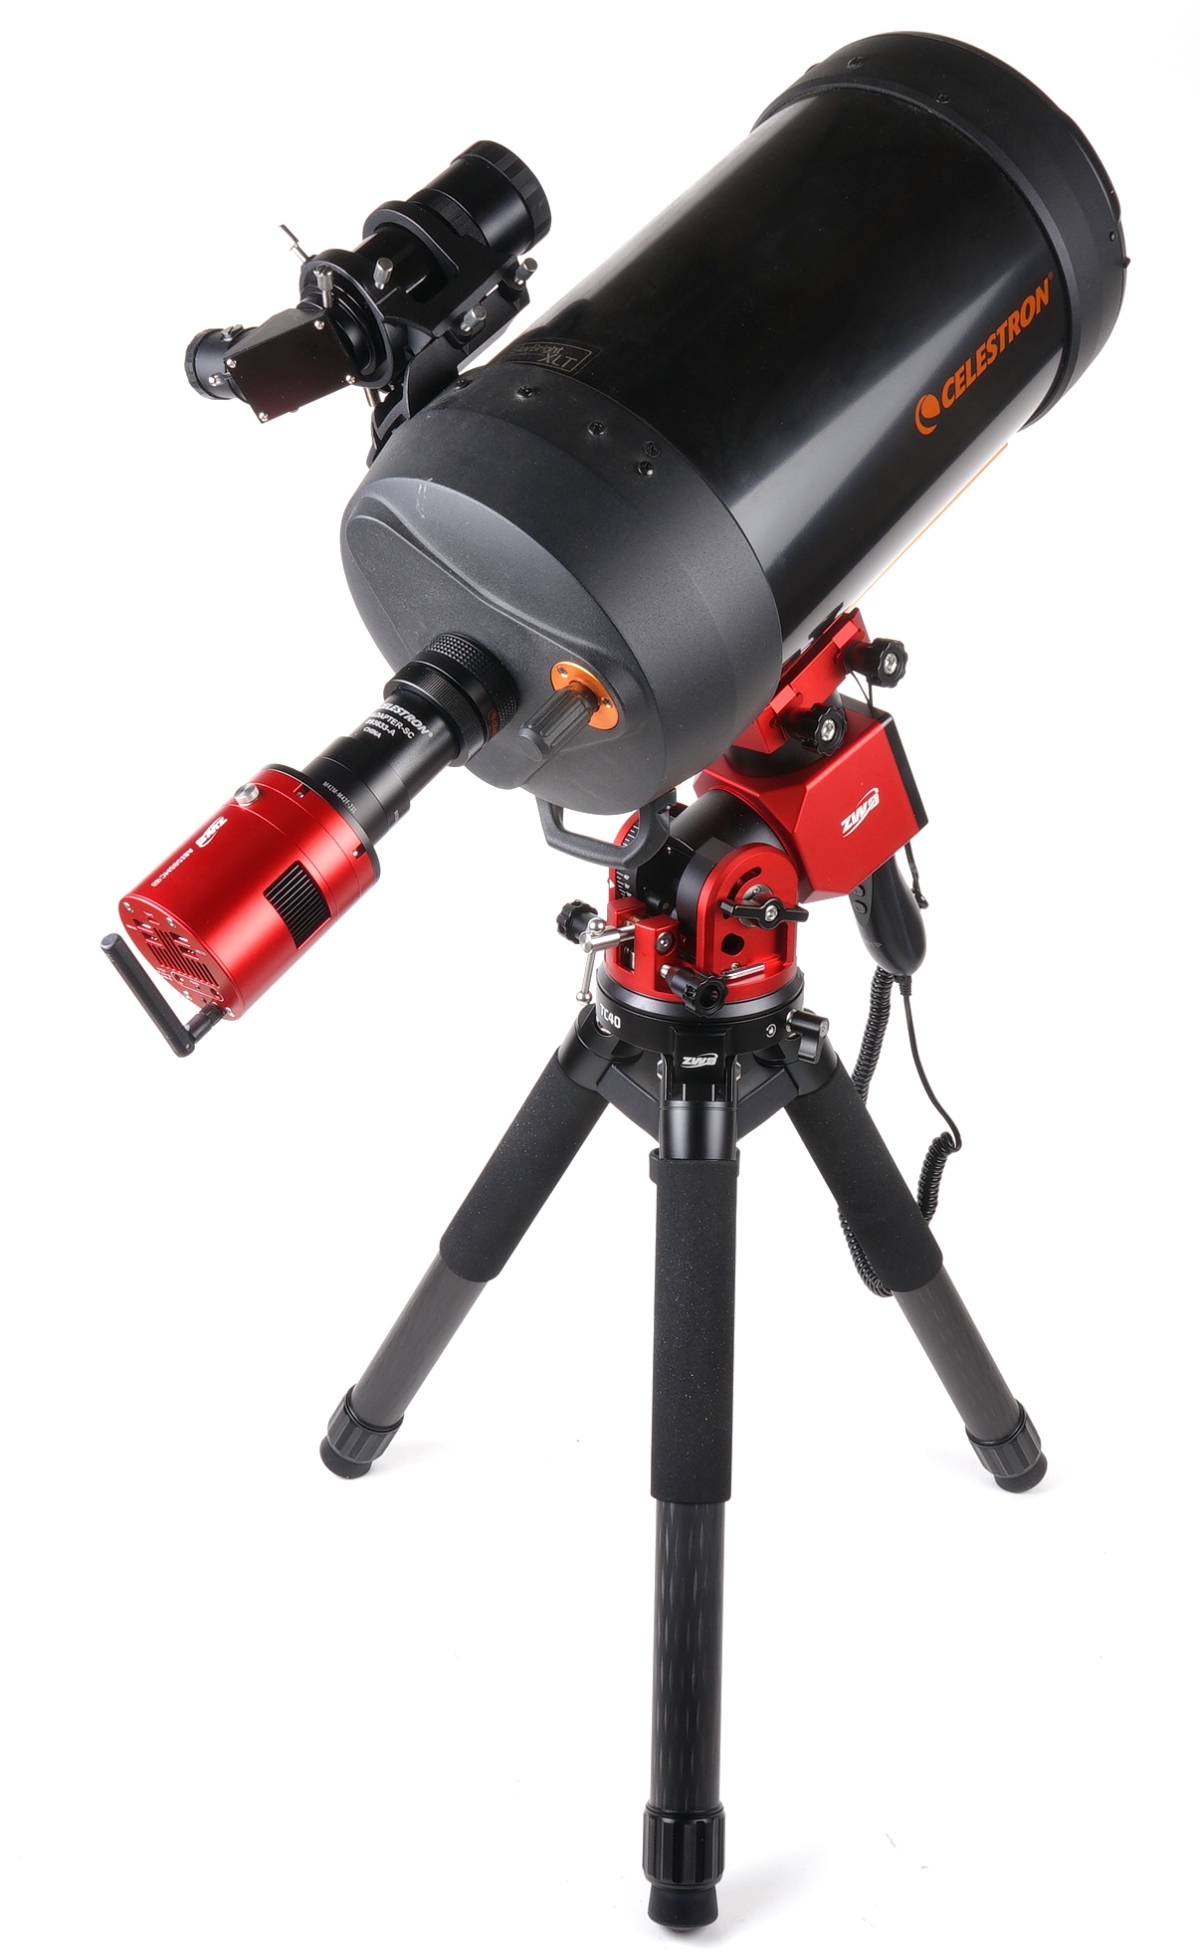
Four days ago the new mount was powered, the joystick on the hand controller was flicked, but the mount just sat there blinking at me through its cyclopic, color cycling red – green eye. Additionally, the mount’s angle of inclination would not exceed 60°, much less the braggadocios 90° indicated on its vertical scale.
Why do manufacturers of costly products revise product performance, operation and design, but supply only down rev manuals? You would think they would want customers to know about and utilize all of great new feature enhancements. The AM3 quick start guide is not true to the AM3N version. Which probably explains why the nonexistent set screws could not be loosened with the hex wrench that was packaged with the mount, but the thumb locks unlocked the mount.
Once downloaded from the ZWO site, the SkyAtlas iPhone app worked like a champ, controlling the mount in both alt-azimuth and equatorial configurations from my iPhone. So a big sigh of relief when the mount proved not dead as a result of operator misdeeds.
The telescope tube plopped right into the mount. No that is not a mini tripod pictured above. The legs are retracted so the assembly would fit on the photo table with a seamless paper backdrop. The telescope’s original 5×24 finder scope was tragic, making it extremely difficult to manually track anything when the observed image is upside down and backward and movement is the opposite of logical. Subsequently, the original finder was replaced with a Celestron 9x50mm Right Angle Correct Image Finder Scope as seen catching a ride atop the scope tube.
A multi-function camera
Since it would take a very long time for me to relay what I saw while looking through the eyepiece of the telescope using a keyboard, adding a camera to the system seemed apropos. After some deep diving research… I watched a Space Koala YouTube video, and based on her enthusiastic recommendation, a ZWO ASI585MC-Air Wireless Smart Camera and Guider was selected as a system component.
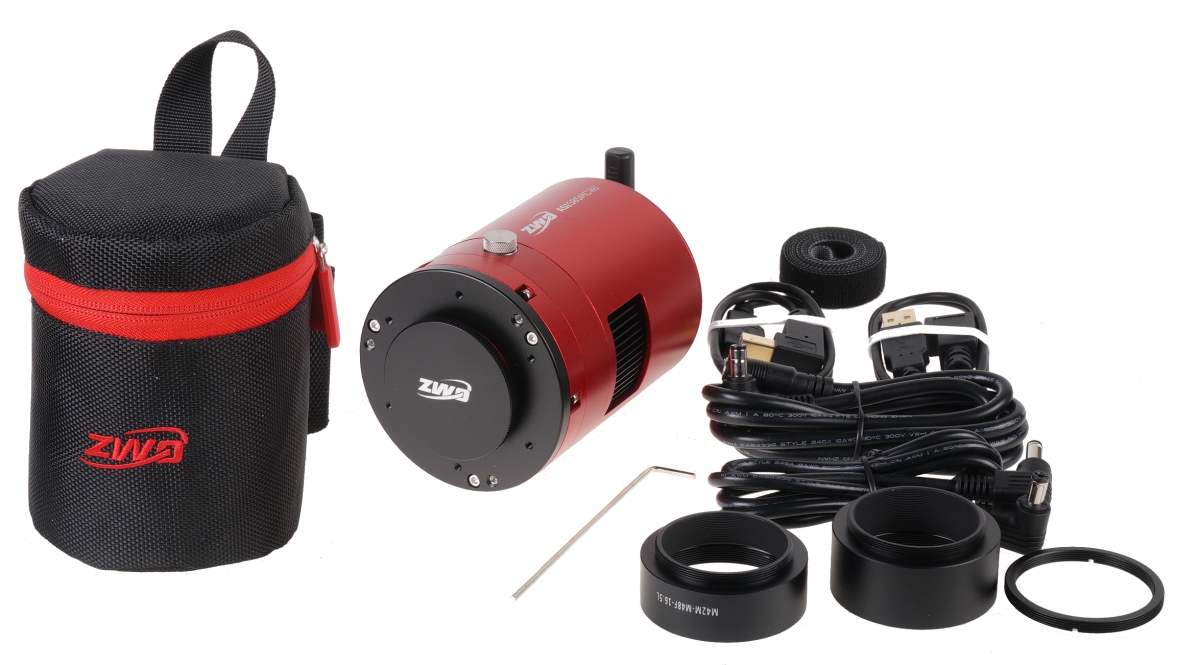
Pictured above with included accessories. The ASI585MC integrates several functions into one compact package; camera for image acquisition, auto guide to stay on a targeted object and ASIAIR, a remote device controller. It is a magnificent camera of expansive capability, even if not the optimal or even correct selection for my telescope. Still, it is anodized an attractive hue of red that matches the telescope mount. Pros and cons. Pros and cons.
The camera’s 2.9 μm pixel size is too small for the telescope’s 2032mm focal length and f10 aperture. The result is a a high signal to noise ratio, increased exposure time and soft images. I hate when that happens. As yet. not done researching a solution, but there appears to be software image processing that will improve the situation. Additionally, a 6.3 reducer/corrector lens was discovered. A leftover from a project of ancient origins.
Inserted on the telescope’s back, the corrector/reducer optically reduces focal length and aperture by 37%; 1280mm focal length and f6.3 aperture. Exposures are reduced, field of view is broadened with edge curvature and eyepiece magnification reduced. This should help with planetary photography, perhaps not so much with deep sky photography… but its finish does match the mount. More camera function and integration details to follow as my brain develops.
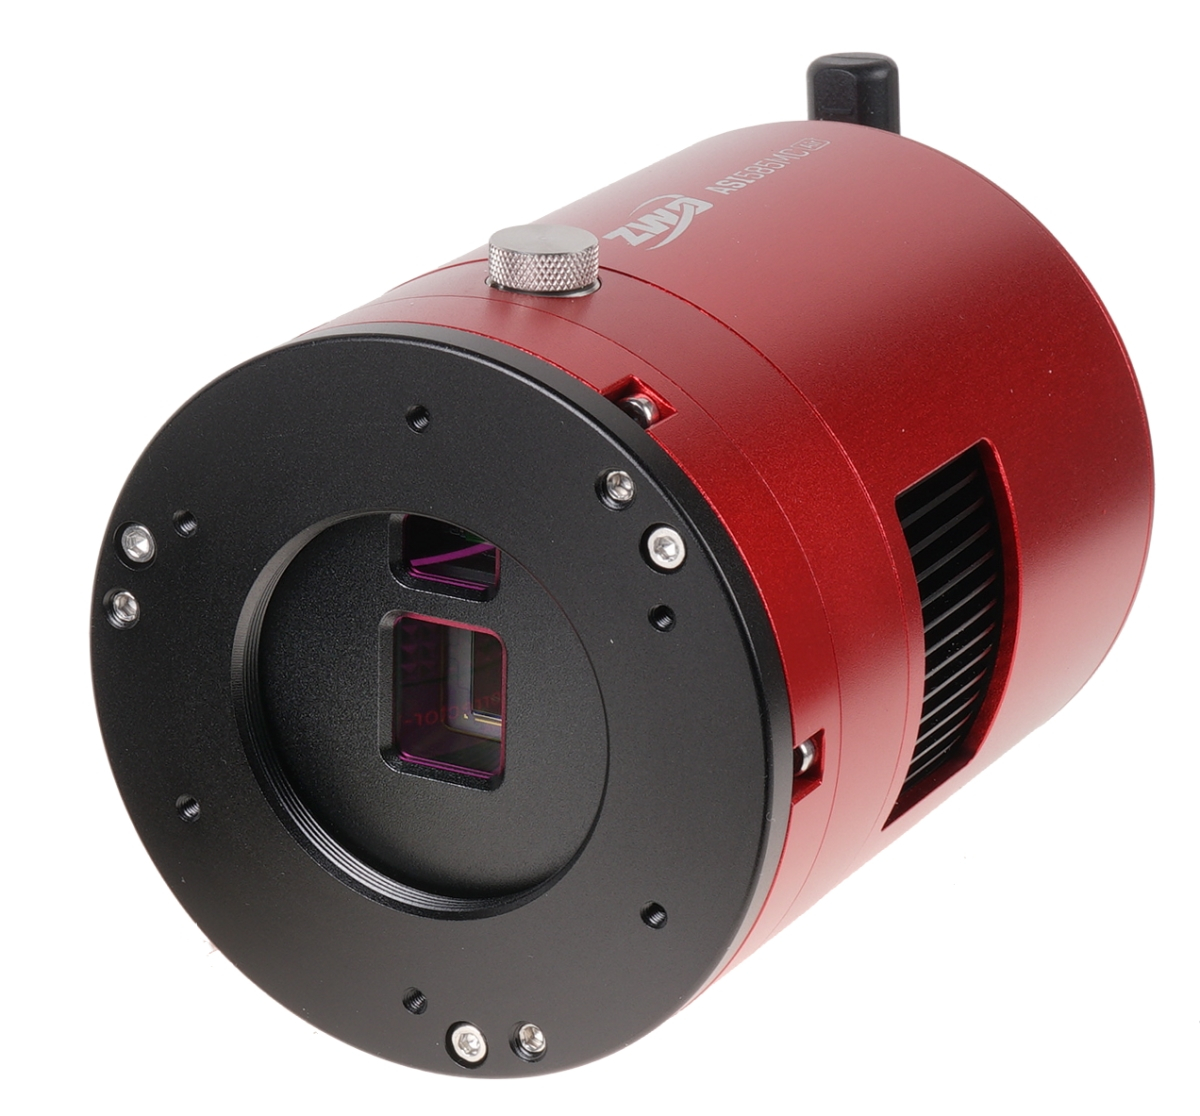
Pictured above, the central imaging CMOS sensor is a back lit Sony Starvis 2 IMX585 color with 3840×2160 (4K) resolution. The upper guide sensor is a SC2210 1920×1080 CMOS device. The ZWO ASI585MC-Air uses a two-stage Thermoelectric Cooling (TEC) system combined with a built-in fan to lower the Sony IMX585 sensor temperature by 30-35°C below ambient temperature. This active cooling method significantly reduces thermal noise and dark current for cleaner long-exposure images.
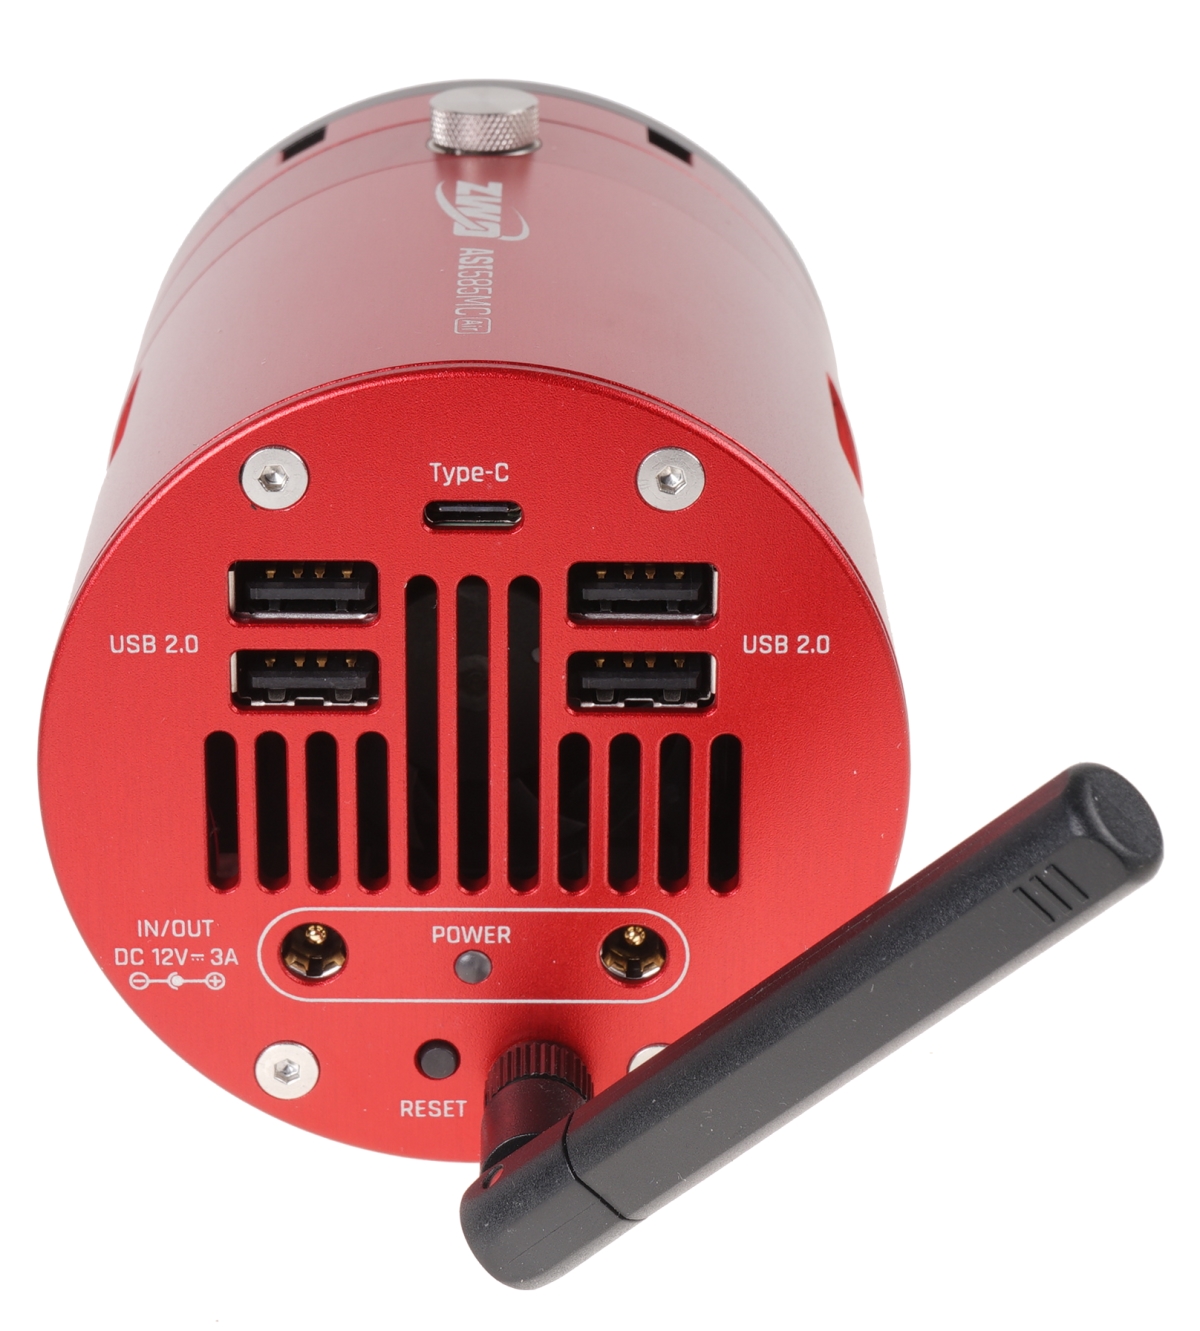
Since the camera has picked up system control responsibilities, it needs to accommodate all of the component connections and power an independent control box would provide. The USB C port is only used to download accumulated images for additional processing. The USB 2.0 ports are for cabling to other associated devices, including up to a Terabyte of external storage . There are two power inputs because… let me see…nope, still don’t get it… but I will.
Losing a visual back diagonal but gaining a back spaced camera
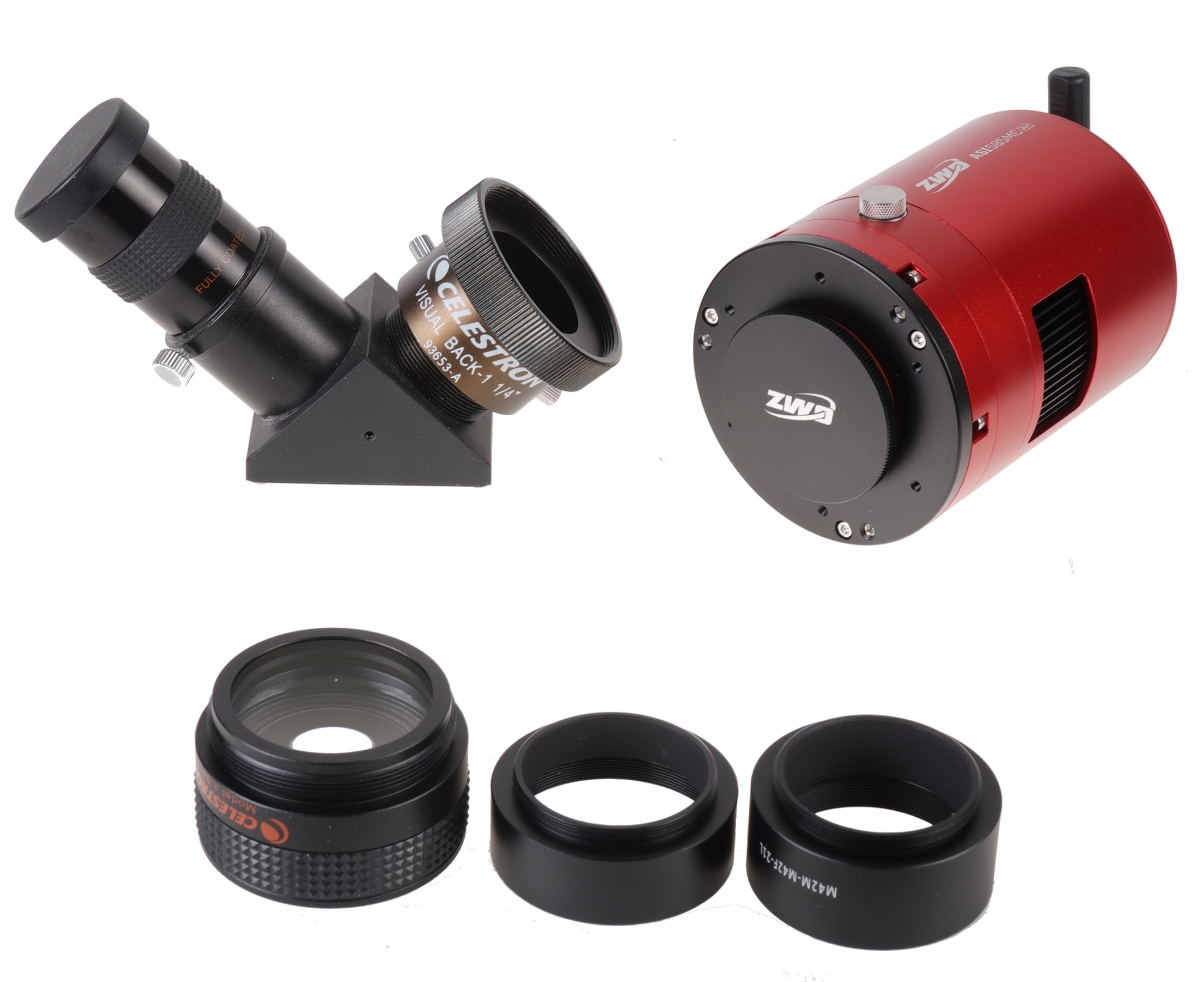
Cameras connected to a Telescope generally need to be back spaced from the last optical element. In this case, the distance from the optical element in the reducer and the camera’s sensor should be 105mm. Bottom of photo above, reducer optic and two spacers.
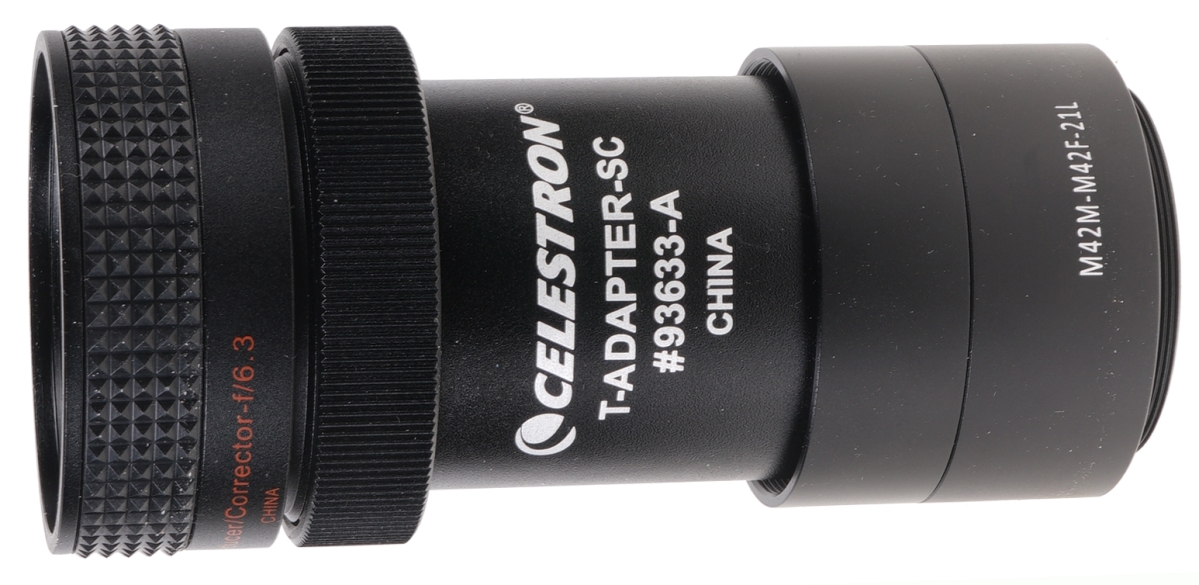
Scrounging around in my telescope tool box, I located a T-Adapter. Added to the reducer, a thread adapter and two spacers supplied with the camera. the 1o5mm backspacing was achieved. No, I lied. I included the reducer thickness within the 105 mm so I am off scrounging in the tool box again, or ordering a spacer.
Let’s pretend the back spacing has already been corrected
I’m going to stop here so I can round up my brain cells, finish this back spacing correction and prep the autofocuser for installation. Getting there. Pretty soon I will arrive at the conductor stage. All of the “musicians” will be seated and all of the instruments will be tuned. I will raise a baton and proceed to lead all in perfect synchronization and harmony. Sure, why not. I have failed to master the drums, the trumpet, and both acoustic and electric guitars. I will learn to play this telescope.


